23 septembre 2025
How to Use Rive App to Animate Your Web and Mobile Interfaces

4 minutes reading

If you've tried out our web and mobile estimator, you may have noticed the illustration reacts dynamically as you make your selections. Check a box, and voilà—an element pops up with a smooth animation. That little bit of magic is powered by Rive app.
In this article, I’ll walk you through how to set up these types of animations—and, more importantly, why we chose Rive over the alternatives.
What is Rive App?
Rive is a tool for creating interactive vector animations. While other solutions generate videos or GIFs, Rive produces lightweight .riv files that can respond to user actions.
The advantages of Rive App
Rive App comes with several key benefits:
- Interactive animations: Your animations can react to user interactions (clicks, hovers, dynamic data)
- Ultra-lightweight files: Rive animations are vector-based and highly optimized, much smaller than equivalent video or GIF files
- Cross-platform: One animation works on both Web and mobile thanks to different runtimes (including React / React Native support)
- Dynamic state: Create complex state machines with conditions and transitions, and bind them to your app's data
Why choose Rive over Lottie or CSS Animations?
Rive stands out for its ability to create truly interactive animations. Lottie is focused on linear, timeline-driven animations, and CSS is great for simple transitions—Rive, however, allows your animation to evolve based on your app’s live context.
For those who remember, Rive is akin to Flash: a platform for creating interactive vector animations.
Two Modes, One Interface
Rive's interface splits into two main sections: Design and Animation. One for setting up your assets, the other for bringing them to life.
Let’s break down the animation of an element from our web and mobile estimator as an example.
Step 1: Setting the Stage
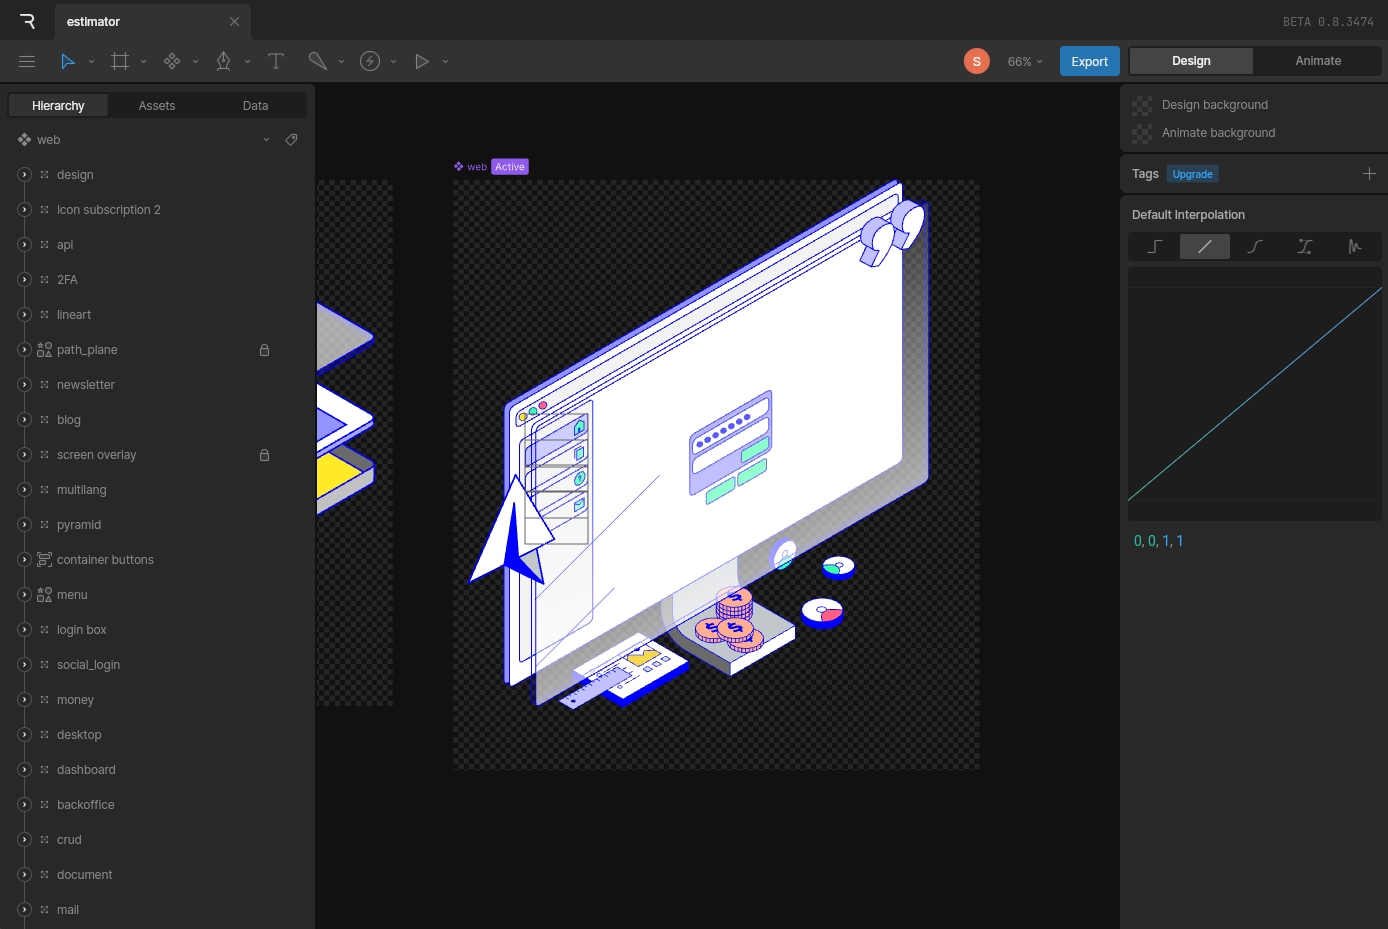
Start by importing your illustration (designed in Figma), and isolating each element on its own separate layer. This step might be a bit tedious, but it's essential: one layer equals one animatable element. Skip this, and things quickly get messy.
Here's my illustration, with each element isolated—visible on the left in the Hierarchy panel:
Step 2: Animation Mode
With the illustration ready, switch to Animation mode using the toggle at the top right of the interface.
This is where timelines, state machines, and interpolation come into play. Rive app's animation tools are based on property interpolation timelines (position, opacity, coordinates, etc.), much like motion design tools such as After Effects.
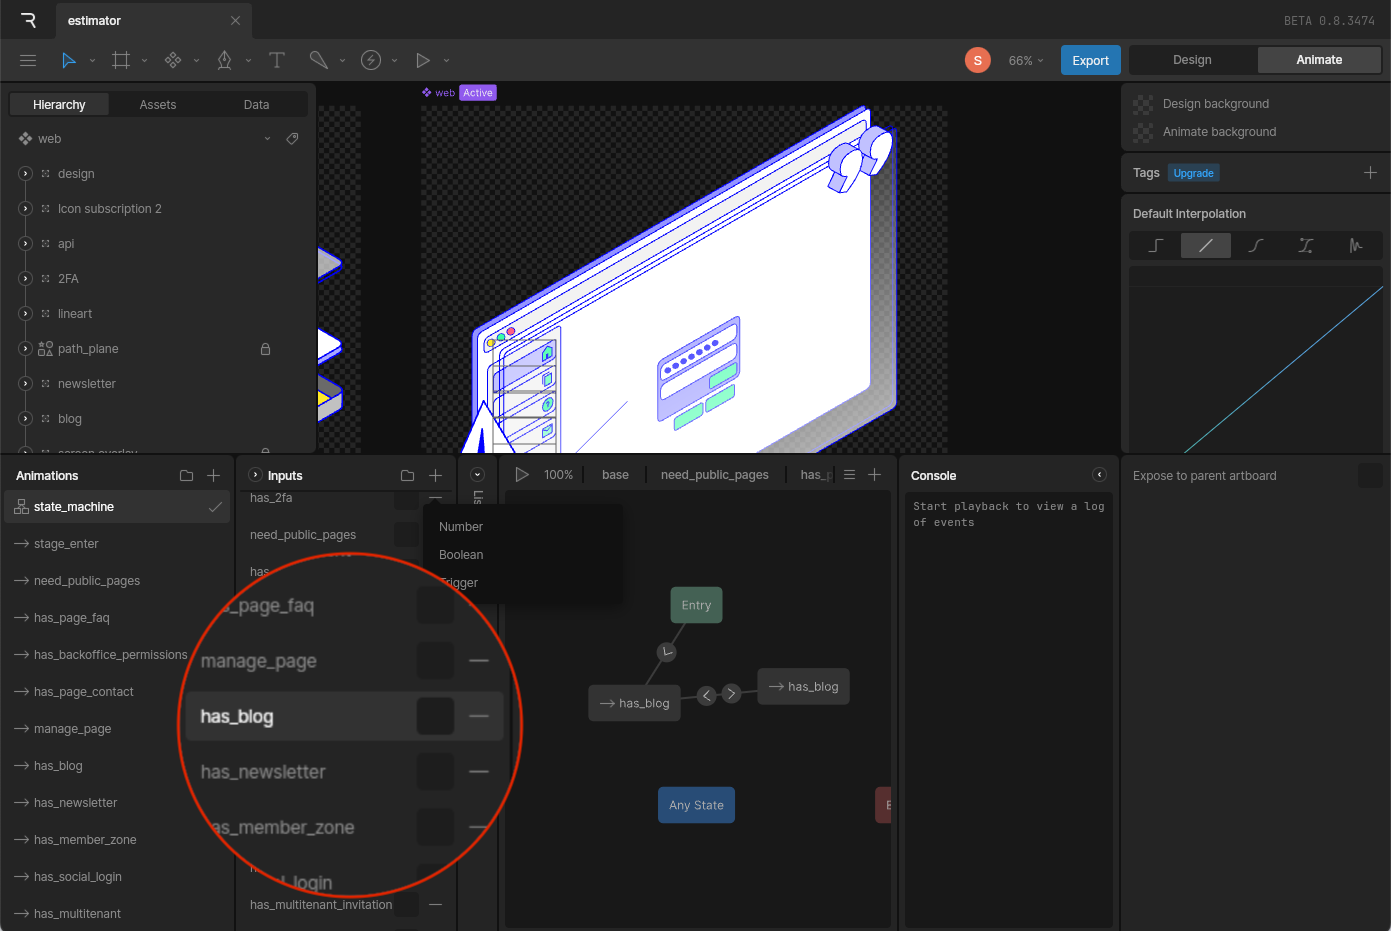
Take, for example, an element we want to display dynamically: here, a pair of quotation marks in the top-right corner of the illustration.
Start by creating a boolean input in the state machine: has_blog. By default, it’s set to false—and later, our React code will toggle it to true:
Time to move on to animation!
Create a new timeline dedicated to this animation, where you’ll interpolate two properties: position and opacity.
It may not be Miyazaki, but it’s enough to breathe life into our element:
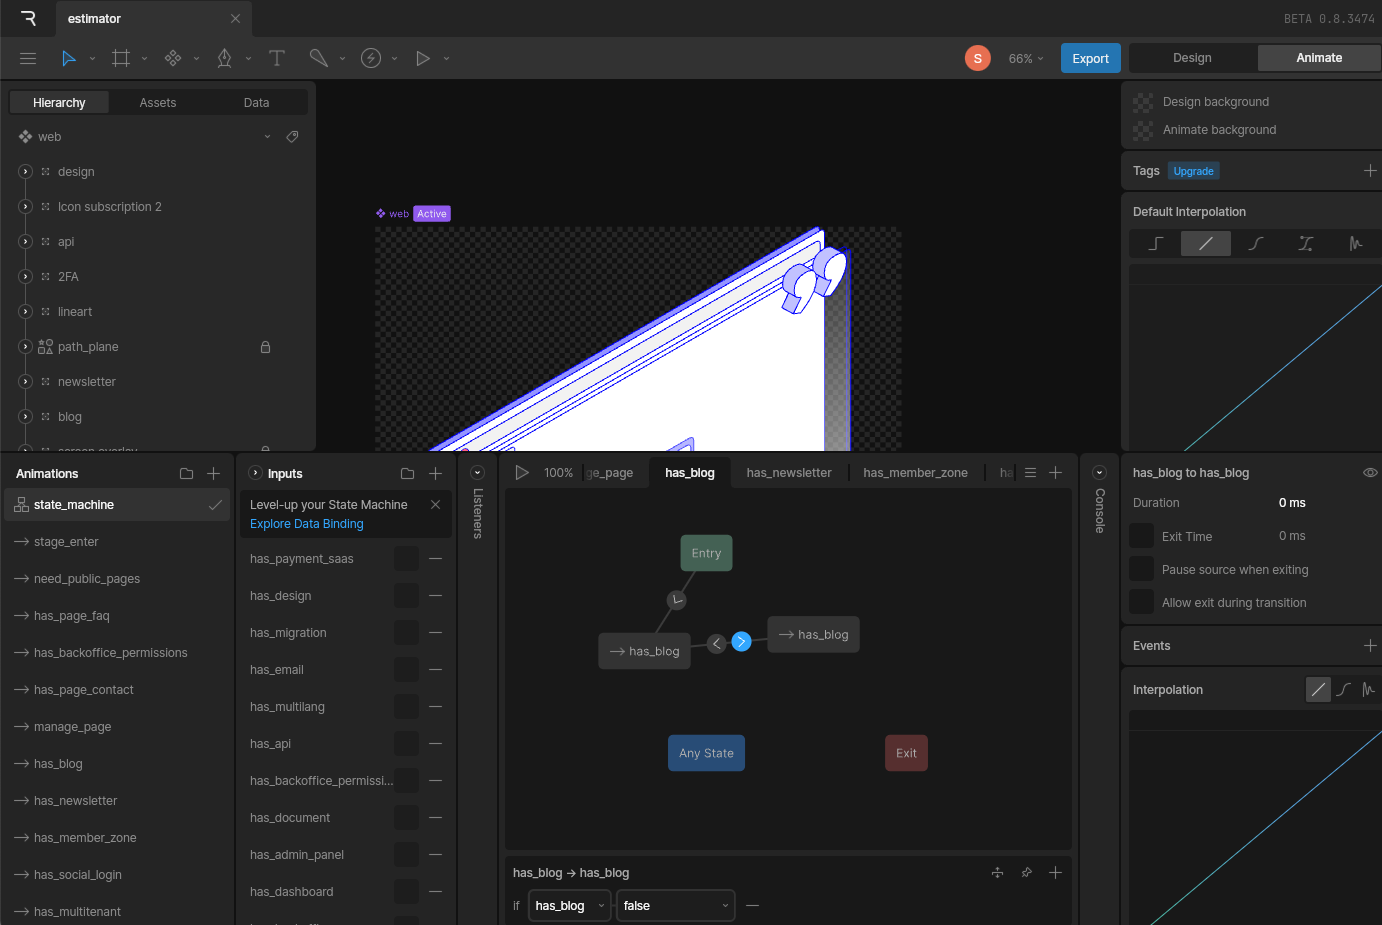
Setting Up the State Machine
After creating the animation, you can now set up the specific state machine for it.
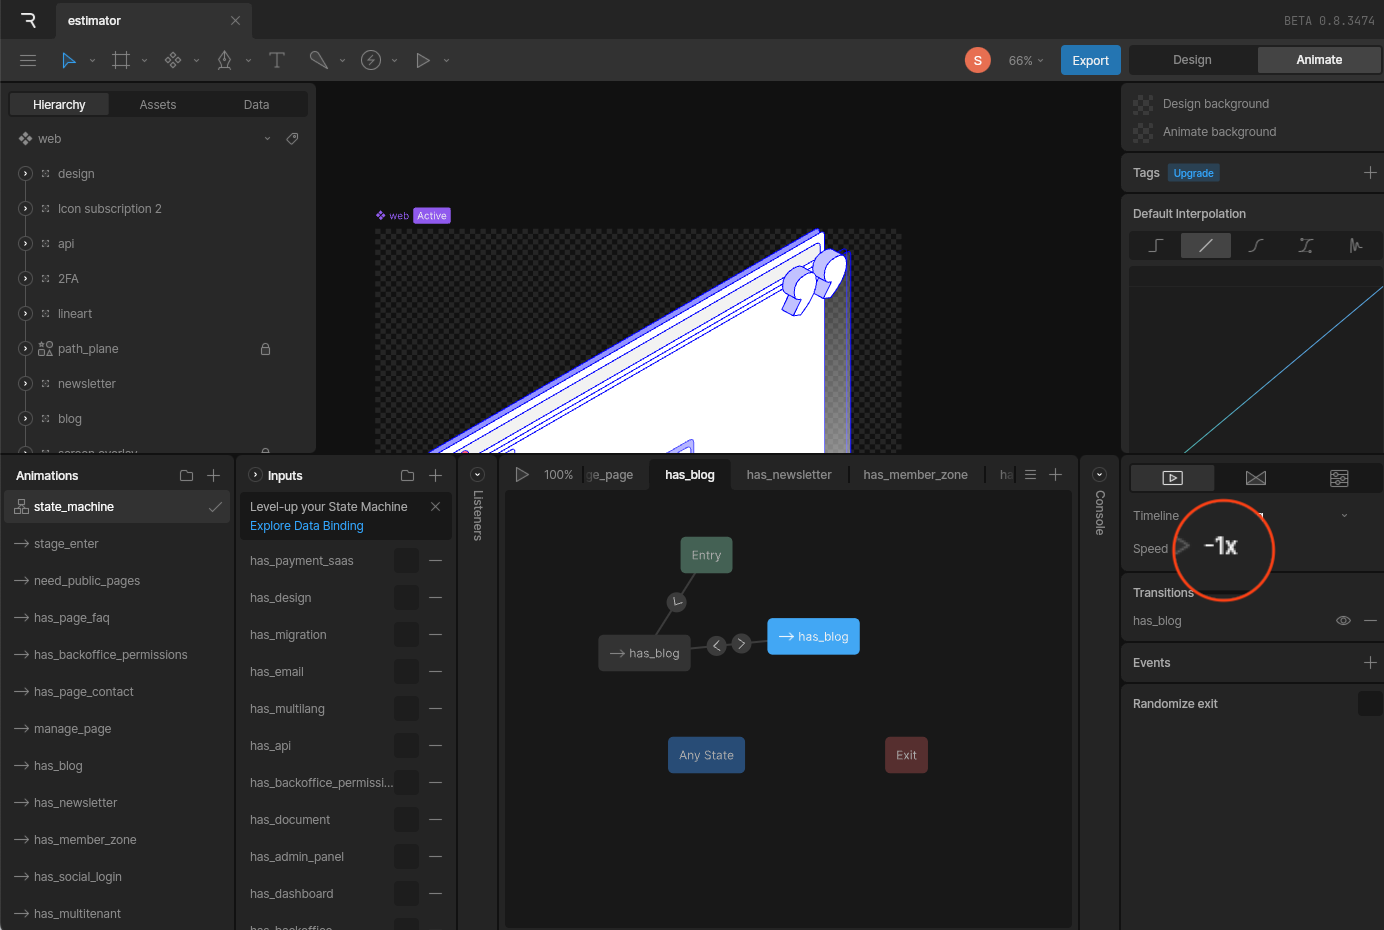
Rive's state machines manage your animation’s state based on conditions. Here, we’ll define two states: one where the animation plays in, and one where it plays out (when the user unchecks the option).
For the "hide" animation, I used a little trick: play the animation in reverse (note the speed set to -1 in the bottom right panel):
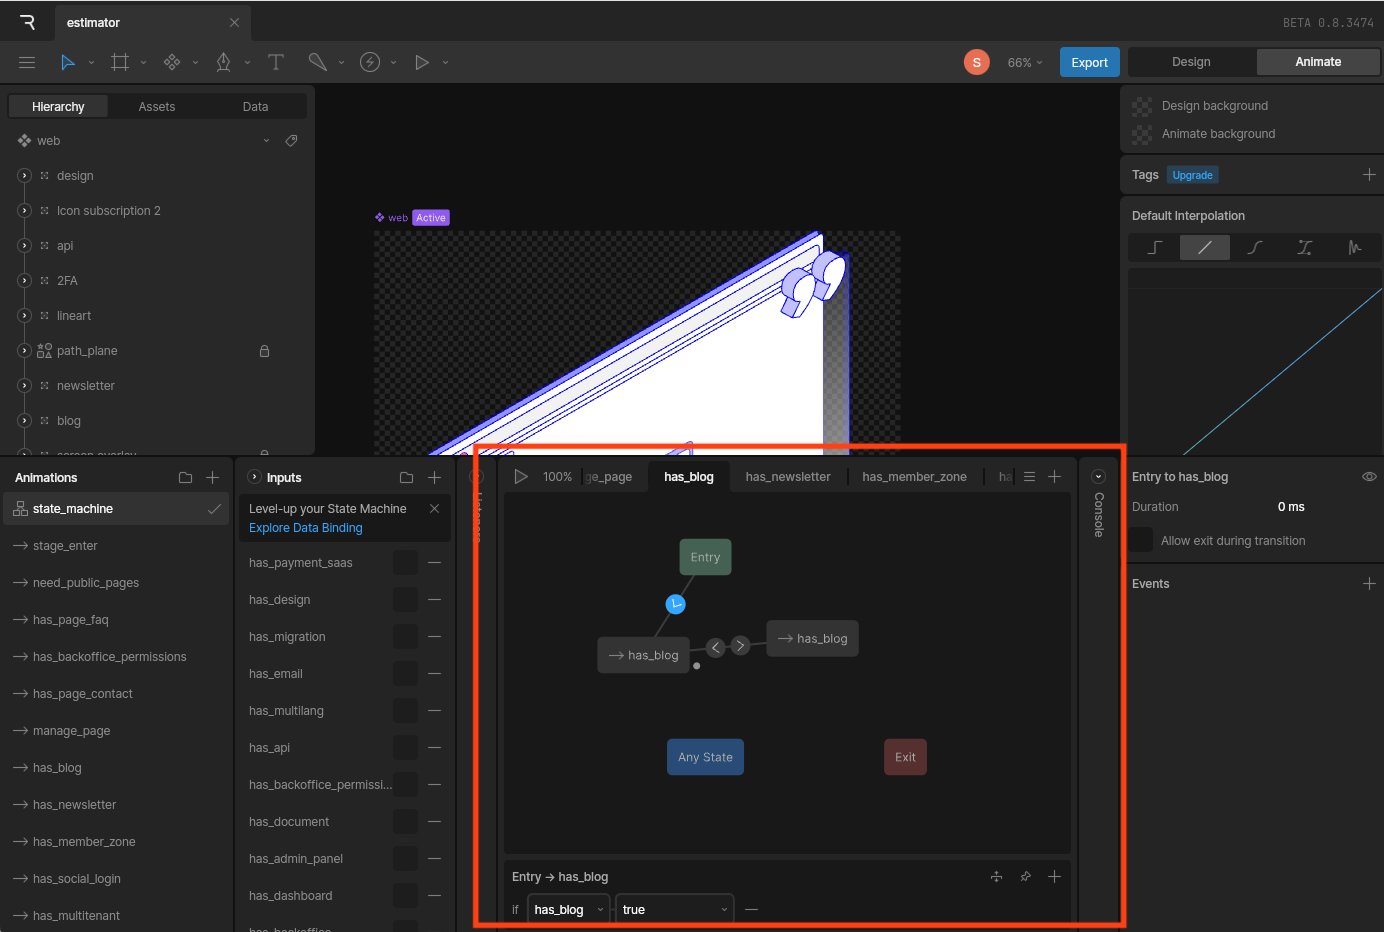
Now all that’s left is to add the conditions to switch between the two states, based on our has_blog input:
The animation is now ready! Every animation in our estimator uses this same pattern. Yes, it’s a bit repetitive—but the end result is well worth the effort.
Integrating Your Rive Animation in React
Now let’s bring our animation into our React project. For this, we can use the official React runtime from Rive.
First, export your animation in .riv format so you can use it with the <Rive/> component:
import { useRive, useStateMachineInput } from '@rive-app/react-canvas'

export const App = () => {
  // Configure your Rive animation
  const { rive, RiveComponent } = useRive({
    src: '/animations/estimator.riv', // Path to your .riv file
    artboard: 'web', // Name of the artboard to use
    stateMachines: 'state_machine', // Name of the state machine
    autoplay: true, // Play animation automatically
  })

  // Retrieve the state machine input
  const hasBlog = useStateMachineInput(rive, 'state_machine', 'has_blog')

  return (
    <>
      <RiveComponent />
      <button onClick={() => (hasBlog.value = true)}>Show Blog Animation</button>
    </>
  )
}
A quick explanation of the code:
-
useRive: This hook sets up and initializes your Rive animation. It returns yourriveinstance and aRiveComponentto render. -
useStateMachineInput: This hook lets you access and manipulate inputs for your state machine. Here, we grab thehas_bloginput we set up in Rive app. -
Interaction: Clicking the button updates
hasBlog.valuetotrue, triggering the animation in Rive.
Your animation is now ready to use in your app!
In Summary
Rive lets you add that special spark to your projects—without sacrificing performance. Its state machine-driven model makes it possible to create subtle, responsive, and fully integrated behaviors in your apps.
Integration with React is seamless and keeps concerns cleanly separated: Rive handles animations, React handles interactions.
Once you get started with Rive, it's hard to go back. My advice: start simple, and gradually explore more advanced features.
Some concrete use cases:
- Animate interface elements like our web and mobile estimator
- Add animations to a React Native app (onboarding screens, etc.)
- Build full apps (games, etc.)
- Create interactive layouts for streaming (via OBS, for example)
If you have a project that could use interactive animations, contact us—we’d love to help you get started with Rive app.
And if you want to play around, try out our web and mobile estimators here.
Useful resources:
👋